Alat alat yang perlu di sediakan:
·
Obeng
·
Solder
·
Timah Solder
Bila di perlukan tambah:
·
Cuter
·
Obeng
·
Kabel Mouse( USB atau PS/2)
·
Amperemeter
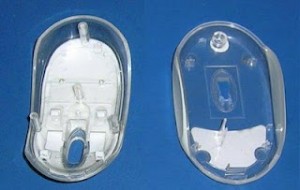
1.Buka CASE/CASING dari mouse tersebut
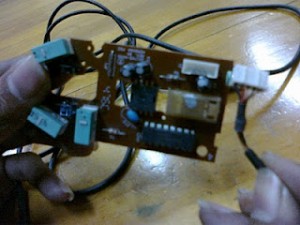
2. Lepaskan PCB yang ada di dalam Mouse dan copot Konektor
antara Kabel Dengan PCB mouse
3.Ambil Cuter lalu Potong ujung Konektor dari kabel mouse
tersebut
4.Setelah itu kupas kabelnya dengan cuter,terus kan ada banyak
warna kabelnya Nah warna kabel kabelnya itu langsung kita pasang pada PCB
Mousenya harus sesuai dengan urutan warna kabel yang sebelumnya
·
(oia jangan lupa untuk melepas Konektor yang ada pada PCB mouse)
lalu Solder ujung ujung Kabel mouse CASE atau CASING mousenya jangan di pasang
dulu
·
setelah selesai di solder Tancapkan mouse tersebut di Konektor
Mouse CPU RESTART komputer Coba anda gerak gerakan mouse anda apabila Pointer
bergerak berarti Mouse anda Sudah bisa di Pakai lagi pasang Kembali CASE atau
CASING mousenya
Equipment that needs to be provided:
• Screwdriver
• Solder
• Lead Solder
When in need add:
• Cuter
• Screwdriver
• Mouse Cable (USB or PS / 2)
• ammeters
1.Buka CASE / CASING of the mouse
2. Remove the PCB that is in the Mouse and dislodged the cable connector withPCB mouse
Cuter then 3.Ambil Cut the cable end connector of the mouse
4.After was peeled cord with cuter, hold it there a lot of color cord cord cord colorsWell we put it directly on the mouse PCB should match the color sequence of theprevious cable
• (oia do not forget to remove the existing connector on the mouse PCB) andsoldering the tip end of the cable or mouse CASE CASING mouse do the pairs offirst
• Plug in the solder after the mouse is on the CPU Connectors Mouse RESTARTyour computer Try moving your mouse movement when the mouse pointer movesmean you can already plug it back in again Use CASE CASING mouse or
http://klikglodok.com


0 komentar:
Posting Komentar